Developing a Progressive Web App from a Static Web App.
Hi Everyone Suraj Here ! Back again with an awesome article on Progressive Web Apps.

From Last Few years PWA's are in Buzz. Tech Giant GOOGLE always talks about PWA in all its major events like I/O, Chrome Developer Summits, Solve for India , Google Developers Days and many more.
Lets Talk little bit about Progressive web Apps according to google.
Progressive Web Apps are experiences that combine the best of the web and the best of apps. They are useful to users from the very first visit in a browser tab, no install required. As the user progressively builds a relationship with the app over time, it becomes more and more powerful. It loads quickly, even on flaky networks, sends relevant push notifications, has an icon on the home screen, and loads as a top-level, full screen experience.

This is file structure for a normal website which does not have any feature of PWA and i am sure it will show a dinosaur when you are offline.
To Make it work like PWA and even show the Contents instead of dinosaur and even you can install and launch it as a standalone application. we need to add two major building blocks of PWA that is manifest.json and Service Worker.
What is manifest file?
The web app manifest provides information about an application (such as name, author, icon, and description) in a JSON text file. The purpose of the manifest is to install web applications to the homescreen of a device, providing users with quicker access and a richer experience. Click here for more info


From Last Few years PWA's are in Buzz. Tech Giant GOOGLE always talks about PWA in all its major events like I/O, Chrome Developer Summits, Solve for India , Google Developers Days and many more.
Lets Talk little bit about Progressive web Apps according to google.
To Know more about PWA Concept have a look at my older post HERE.
Today I am Going to Show How You can Convert your Existing Static Website to a Progressive Website in minutes.
In this article i am going to use a bootstrap website as a normal website.
My Normal website: https://github.com/BlackrockDigital/startbootstrap-freelancer/archive/gh-pages.zip
Step 1: Extract your Website Directory on Desktop.
Step 2: Start Live Server in Your Website Directory(if you don't know download 200 ok server from chrome store).
Step 3: Now open your project directory in your Favorite IDE(I am using Brackets) you can use any one like Atom,Sublime,Visual Studio Code etc.
Your Project File Structure Looks Like this.

This is file structure for a normal website which does not have any feature of PWA and i am sure it will show a dinosaur when you are offline.
To Make it work like PWA and even show the Contents instead of dinosaur and even you can install and launch it as a standalone application. we need to add two major building blocks of PWA that is manifest.json and Service Worker.
What is manifest file?
The web app manifest provides information about an application (such as name, author, icon, and description) in a JSON text file. The purpose of the manifest is to install web applications to the homescreen of a device, providing users with quicker access and a richer experience. Click here for more info
What is service worker?
Service workers essentially act as proxy servers that sit between web applications, and the browser and network (when available). They are intended to (amongst other things) enable the creation of effective offline experiences, intercepting network requests and taking appropriate action based on whether the network is available and updated assets reside on the server. They will also allow access to push notifications and background sync APIs.
Step 4. Make Sure you have you have your application icon which is visible on Device Home Screen and Splash Screen but for all device devices with different screen sizes and resolution so we need icon image image of different here i am going to use an online service for generating manifest and image of different sizes in just 3 clicks.
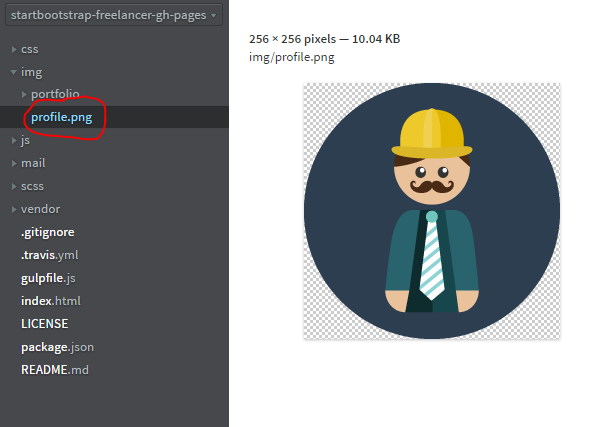
I am going to use "profile.png" as my app icon that resides under img folder.


In the above screenshot you can see chrome is prompting me to add this app to my homescreen to use it offline anytime and that's the beauty of Progressive web apps.
I am going to use "profile.png" as my app icon that resides under img folder.
Now Open "https://www.favicon-generator.org/"
Upload your Icon image as shown below and click on "create favicon" button.

Now Download the generated zip file and extract it to the root directory of your project.

After extracting your file structure will look like this.
It Contains icons of different sizes and a manifest.json in our root directory of our project.
Step 5: Now open "index.html" file of your project.

Step 6: Copy the following code generate by online favicon generator as shown below.

Step 7: Paste the above copied code just above the closing of head tag (</head>) line no 23 in index.html. as shown below.

Great Job till now !
Step 8 : Now open "manifest.json file" and add the app name, short name etc as shown in the screenshot below(line no. 2 to 7) . Don't touch the icons array its all right.

Step 9: I.Now save your "index.html" and "manifest.json" file.
II.Open your website's index.html on your live server in chrome.
III.Now open chrome developers tool under Application tab select Manifest you will see your manifest file details detected by the browser. as shown below.

Great you have completed 60% of the task.
Step 10: Now its time for the second building block that is "Service Worker".
Copy the below code(with saffron highlight) at bottom of index.html under script tag.
<script>
if (navigator.serviceWorker.controller) {
console.log(' active service worker found, no need to register')
} else {
navigator.serviceWorker.register('sw.js', {
scope: './'
}).then(function(reg) {
console.log('Service worker has been registered for scope:'+ reg.scope);
});
}
</script>
After Pasting the above code your index.html will look like the below screenshot

Step 11: Its time to create the "sw.js" file that is our service worker file.
Create a "sw.js" file in the root directory of your project.
Step 12: Open the "sw.js " and paste the below code in sw.js file.
//Install stage sets up the index page (home page) in the cahche and opens a new cache
self.addEventListener('install', function(event) {
var indexPage = new Request('index.html');
event.waitUntil(
fetch(indexPage).then(function(response) {
return caches.open('pwa-offline').then(function(cache) {
console.log(' Cached index page during Install'+ response.url);
return cache.put(indexPage, response);
});
}));
});
//If any fetch fails, it will look for the request in the cache and serve it from there first
self.addEventListener('fetch', function(event) {
var updateCache = function(request){
return caches.open('pwa-offline').then(function (cache) {
return fetch(request).then(function (response) {
console.log(' add page to offline'+response.url)
return cache.put(request, response);
});
});
};
event.waitUntil(updateCache(event.request));
event.respondWith(
fetch(event.request).catch(function(error) {
console.log( ' Network request Failed. Serving content from cache: ' + error );
//Check to see if you have it in the cache
//Return response
//If not in the cache, then return error page
return caches.open('pwa-offline').then(function (cache) {
return cache.match(event.request).then(function (matching) {
var report = !matching || matching.status == 404?Promise.reject('no-match'): matching;
return report
});
});
})
);
})
After Pasting save your sw.js file and it will look like the below screen shot.

Now you are done with everything its time to test your app!!!
Step 13: Open your website on live server in chrome -> chrome developer tools -> Applications -> Service worker
Here you will see a registered service worker as "sw.js" as shown below

Now test this app in offline mode by clicking on offline checkbox in service worker tab as shown below.

After checking offline mode when we reload the page it will show the internet connection error but it will not show dinosaur but your app will run offline.
I hope this article will be helpful for you and you learned the whole working procedure . I know it was quite long procedure many of you may get confused . I will soon making a video tutorial for the above procedures.
You Can use Chrome extensions like Lighthouse to Audit your PWA App and make certain correction or adding properties in manifest file.
You Can use Chrome extensions like Lighthouse to Audit your PWA App and make certain correction or adding properties in manifest file.
If you face any problem feel free to contact me on Facebook
Happy Even Offline!!


Comments
Post a Comment